How To Place a Support using a Support Locator
- Select the Pipe Clamp option from the Catalog Pipe Attachments tool drawer.
-
When prompted to select a pipe, double click on the top pipe with the Support Locator.
The following message prompts you to select a steel (structural) component to align the support with.
-
If you intend to connect the support to a support structure, select it now. Otherwise, click <ESC> to manually select a location along the pipe section.
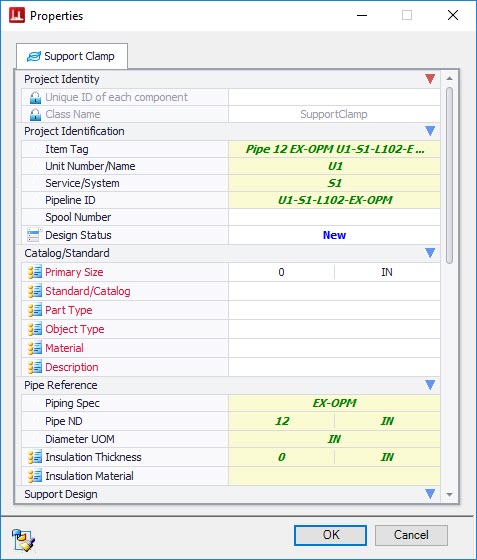
The Properties Dialog displays. This dialog is used to define the properties of the support component. The essential properties are marked in red.
- Under the Catalog section, click in the field next to Standard/Catalog to display a grid providing a list of available Pipe Clamp components along with all of the catalog information for the components.
- Select a pipe clamp option from the grid. When you do, OpenPlant Modeler will populate the remaining essential fields using the catalog information of the selected clamp.
- When finished defining properties click OK.
- Select a point on the Support Locator to place the support (in this example the Clamp).
-
Left click one time to complete the placement.
The Linenumber, Unit and Service information is transferred to the clamp.
- If you have no further need for the locator, you can delete it using the standard Delete Element command.